USA Study Visa Process Step-by-Step: From Application to Approval
Dream of studying in the USA? This comprehensive guide simplifies the complex F-1 and M-1 student visa process. Learn about eligibility, application steps, financial requirements, and interview preparation. From choosing a SEVP-certified school to arriving on campus, we’ll help you navigate each stage. Start your American education journey today!
Important information
- Acceptance from a Student and Exchange Visitor Program (SEVP)-certified school is required to get a Form I-20, which is essential for the visa application.
- You must prove you have enough money for tuition, living costs, and related expenses. Bank statements, scholarship letters, and sponsorship documents are acceptable proof.
- Complete the online DS-160 form, pay the SEVIS fee, and the visa application fee before scheduling your visa interview at a US embassy or consulate.
- The visa interview involves reviewing your application, fingerprints, and questions about your study plans, finances, and intent to return home after completing the program.
- After approval, you typically receive your visa within one business day. You must present your passport, visa, and Form I-20 upon arrival in the US.
Understanding the USA Study Visa Process
To study in the United States can be a fulfilling experience. There are numerous steps you need to take.
Research and select a program. Carefully consider your academic goals, financial resources, and preferred location when choosing a university and program.
Prepare for standardized tests. Most universities require international students to submit scores from tests such as the TOEFL or IELTS for English proficiency and the SAT or ACT for undergraduate admissions. GRE or GMAT scores are typically required for graduate programs.
Complete the application process. Each university has its own application requirements, so be sure to check the specific instructions on their website. Commonly required documents include transcripts, letters of recommendation, and a statement of purpose.
Apply for a student visa. After receiving an acceptance letter from a university, international students must apply for an F-1 or M-1 student visa. This involves completing the online application, paying the visa fee, and attending an interview at the U.S. embassy or consulate in their home country.
Arrange for finances. Demonstrate proof of funds to cover tuition fees, living expenses, and other related costs. This may involve providing bank statements, scholarship letters, or sponsorship documents.
Find accommodation. Explore various housing options, such as on-campus dormitories, off-campus apartments, or homestays. Research the costs and locations to find a suitable living arrangement.
Prepare for departure. Book flights, arrange for health insurance, and pack essential documents and belongings. Familiarize yourself with the U.S. customs and immigration procedures.
What is a USA Study Visa?
Considering studying abroad? Here’s a step-by-step guide to help you navigate the process:
Step 1: Self-Reflection and Research
Identify your academic goals, preferred field of study, and desired destination. Research potential universities and programs that align with your interests and aspirations.
Step 2: Funding and Finances
Explore scholarship opportunities, financial aid programs, and personal funding options. Create a realistic budget that encompasses tuition fees, living expenses, travel costs, and other potential expenditures.
Step 3: Application Process
Carefully review the application requirements for each university and program. Gather necessary documents, including transcripts, letters of recommendation, and standardized test scores. Prepare a compelling personal statement that showcases your strengths, experiences, and motivations.
Step 4: Visa and Immigration
Research visa requirements for your chosen destination. Begin the visa application process well in advance and ensure you have all the necessary documentation.
Step 5: Pre-Departure Preparations
Arrange accommodation, book flights, and research the local culture and customs of your destination. Pack appropriately and ensure you have all essential items, including travel insurance and any necessary medications.
Benefits of Studying Abroad
- Gain a global perspective.
- Enhance your cross-cultural skills.
- Boost your career prospects.
- Experience personal growth.
- Expand your network.
Challenges of Studying Abroad
- Culture shock and homesickness.
- Language barriers.
- Financial adjustments.
- Academic differences.
- Logistical challenges.
Types of Student Visas: F-1 and M-1
Planning to study in the US? You will need a student visa. The two primary options are the F-1 and M-1 visas.
F-1 Visa
Designed for academic studies, such as bachelor’s or master’s degrees.
Allows entry to the US up to 30 days before the program starts.
Permits part-time, on-campus employment and offers practical training options.
M-1 Visa
Intended for vocational training programs, like technical schools.
Typically allows arrival closer to the program start date.
Generally restricts employment.
Both visa types require acceptance from a Student and Exchange Visitor Program (SEVP)-certified institution. Carefully select the visa that aligns with your academic and career aspirations.
Eligibility Requirements for a USA Study Visa
Securing a US student visa involves several key steps. First, you must be accepted into a Student and Exchange Visitor Program (SEVP)-certified school. Second, demonstrating sufficient funds for tuition, living expenses, and other costs is crucial. Third, additional requirements, varying by individual circumstances and chosen program, may also apply. Fourth, a valid passport and a completed DS-160 non-immigrant visa application are mandatory. Finally, English proficiency must be proven, typically through TOEFL or IELTS scores, although alternative options may be available.
Gain acceptance into a Student and Exchange Visitor Program (SEVP)-certified school.
Demonstrate sufficient funds for tuition, living expenses, and other costs.
Meet additional requirements, which may vary based on individual circumstances and the chosen program.
Obtain a valid passport and complete the DS-160 non-immigrant visa application.
Prove English proficiency, typically through TOEFL or IELTS scores, though alternatives might be available.
Meeting F-1 Visa Requirements
Step 1: Secure Acceptance from an SEVP-Certified School
Obtain acceptance from a Student and Exchange Visitor Program (SEVP)-certified school. This is essential for visa eligibility.
Step 2: Maintain Full-Time Enrollment
Full-time enrollment at the SEVP-certified school is mandatory.
Step 3: Maintain a Residence in Your Home Country
Maintain a residence in your home country throughout your studies.
Step 4: Demonstrate English Proficiency
Demonstrate English proficiency. Enrolling in language courses is an option if needed.
Step 5: Show Proof of Funds
Demonstrate sufficient funds to cover your tuition and living expenses.
Step 6: Secure a Valid Passport
Obtain a valid passport that extends at least six months beyond your program’s start date.
Proving English Language Proficiency
International students looking to study abroad typically need to prove their English language skills. Commonly accepted tests include the TOEFL, IELTS, and PTE. Some universities may accept other tests or waive the requirement based on certain criteria. Checking your prospective university’s website for their specific English language requirements is essential.
Demonstrating Sufficient Funding
Financial documentation is crucial for a US student visa application. You must prove you can afford tuition, living expenses, and other related costs. Acceptable proof includes bank statements, scholarship letters, and sponsorship documents. The required amount varies depending on the school and its location. For example, a New York City school might require more funds than one in a smaller town. Similarly, private universities often have higher tuition fees than public institutions. Consult your chosen school’s website for specific financial requirements. This will ensure you have sufficient funds and the correct documentation for your visa application.
Required Financial Documentation
- bank statements,
- scholarship letters,
- sponsorship documents.
Factors Affecting Costs
- school’s location,
- type of institution (private vs. public).
Consult your school’s website for specific financial requirements to ensure you have sufficient funds for your visa application.
Step-by-Step Guide to Applying for a USA Study Visa
Choose a Student and Exchange Visitor Program (SEVP)-certified school. Research various programs and submit your applications, ensuring you meet each school’s specific requirements.
Upon acceptance, the school will issue your Form I-20 (“Certificate of Eligibility”). This crucial document details your program’s start and end dates, tuition costs, and your unique SEVIS ID number.
Pay the I-901 SEVIS fee, which supports the Student and Exchange Visitor Information System (SEVIS). SEVIS tracks F and M visa holders throughout their stay in the US.
Complete the online DS-160 visa application with accurate personal, academic, and travel information. Print the confirmation page with its barcode for your interview.
Pay the non-refundable visa application fee and keep the receipt for your interview.
Schedule your visa interview at the nearest US embassy or consulate.
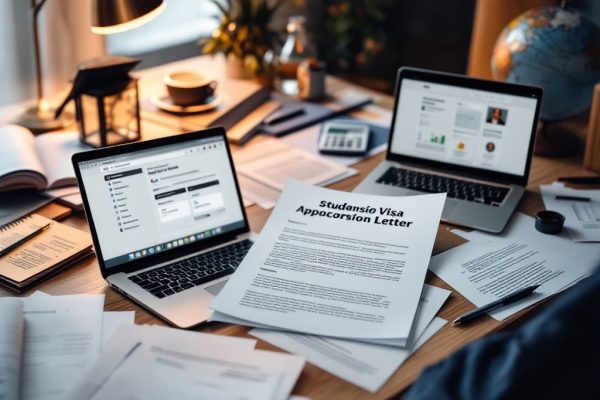
Gather all required documents for your interview: passport, Form I-20, fee receipt, DS-160 confirmation page, financial documentation proving you can cover your expenses, and potentially additional documents like transcripts or test scores.
1. Obtain Admission from a SEVP-Certified School
Acceptance into a Student and Exchange Visitor Program (SEVP)-certified school is the first step for your visa application. This acceptance allows the school to issue you the necessary Form I-20.
2. Receive Form I-20 from Your University
Congratulations on your acceptance to a SEVP-certified U.S. university! Your Form I-20, or “Certificate of Eligibility for Nonimmigrant Student Status,” is on its way. This vital document confirms your acceptance and is essential for your visa application. It includes important details like your SEVIS ID, program specifics, and financial information. Please review it carefully for accuracy and keep it secure throughout your U.S. studies.
3. Pay the I-901 SEVIS Fee
Before your visa interview, pay the I-901 SEVIS fee. This is mandatory for F, M, and J student visas. Double-check that the SEVIS ID on your payment receipt matches the one on your I-20 form. This fee helps maintain the Student and Exchange Visitor Information System (SEVIS), which keeps track of student records.
4. Complete the DS-160 Non-Immigrant Visa Application
To apply for a nonimmigrant visa, complete the free online application, Form DS-160. This form requests your personal information, travel plans, and visa details. Accurate completion ensures smooth processing. Once submitted, print the confirmation page for your visa interview. This document is required. Here’s a step-by-step guide:
Complete Form DS-160. Access the free online DS-160 application form.
Provide Information. Enter your personal details, travel plans, and visa-related information accurately.
Submit the Form. After reviewing for accuracy, submit the completed DS-160 form electronically.
Print Confirmation. Print the confirmation page that appears after submission. This is a required document for your visa interview.
5. Pay the Visa Application Fee
Pay the non-refundable $160 Machine Readable Visa (MRV) fee before your interview. You may also need to pay a visa issuance reciprocity fee, depending on your citizenship. Visit the U.S. Embassy or Consulate website for specific fee details.
6. Schedule and Attend Your Visa Interview
Schedule your visa interview at the nearest US embassy or consulate after paying your application fee. Each applicant must schedule an individual appointment, ensuring the DS-160 confirmation number matches the one used during scheduling.
Be prepared to discuss your academic plans, how you will finance your education, and your reasons for studying in the US. A consular officer will assess your eligibility for an F-1 or M-1 visa based on US law.
The officer will collect your fingerprints. The interview typically lasts about five minutes.
Remember to bring essential documents: your Form I-20, DS-160 confirmation page, visa fee receipt, valid passport, financial documentation, and any other supporting materials.
You will pay the visa fee upon arrival at the embassy.
7. Present Required Documentation at the Interview
Bring your Form I-20, DS-160 confirmation page, visa fee receipt, and a valid passport to your visa interview.
Also, have financial and supporting documents with you.
Be prepared, as the consulate might request other forms.
Preparing for Your Visa Interview
Gather Your Documents
Compile all necessary documents:
- Form I-20.
- DS-160 confirmation.
- Visa fee receipt.
- Passport.
- Financial documentation proving you can cover your educational expenses.
- Evidence of your intent to return home after your program.
Consult your specific consulate for any additional paperwork.
Prepare for Your Interview
Thorough interview preparation is crucial. Practice discussing the following:
- Your study plans.
- Your financial resources.
- Your post-graduation intentions.
Clearly explain why you chose to study in the U.S. and your commitment to returning home afterward. Be honest and conversational, avoiding memorized answers. View the interview as a chance to share your story.
Gathering Required Documents
Gather your I-20 form.
Compile proof of your financial stability.
Ensure you have a valid passport.
Bring your DS-160 confirmation.
Confirm your SEVIS and visa application fee payments.
Include your academic transcripts and standardized test scores.
Provide documents demonstrating ties to your home country.
Have a recent 2×2 inch photograph taken within the past six months.
Tips for a Successful Visa Interview
Dress professionally to make a strong first impression.
Maintain eye contact and answer all questions truthfully.
Clearly articulate your US study plans, explaining your program and university choices.
Demonstrate your financial ability to cover tuition and living expenses.
Highlight your ties to your home country and your intention to return after completing your studies.
Ensure you have all necessary documents, including your I-20, DS-160 confirmation, and financial documentation.
Be prepared to discuss your academic background and English proficiency.
Familiarize yourself with the visa process, anticipate potential questions, and practice your responses to build confidence.
Arrive on time for your interview.
Visa Approval and Arrival in the United States
Your F-1 visa typically arrives in your passport the next business day after embassy or consulate approval. If additional processing is needed, they will contact you. A signed authorization letter allows someone else to retrieve your visa. Ensure all your visa details are correct.
Upon arrival in the United States, a Customs and Border Protection (CBP) officer will review your passport, visa, and Form I-20.
A secondary inspection might occur if any questions arise.
If admitted, you’ll receive Form I-94, your arrival/departure record, indicating your authorized stay duration.
Maintaining valid F-1 status is essential. Adhere to all regulations, including attending your assigned school, carrying a full course load, and observing employment restrictions. Your Designated School Official (DSO) offers valuable guidance regarding F-1 visa maintenance.
Receiving Your F-1 Visa
After a successful interview, your passport will contain your F-1 visa, granting you student status in the US.
Carefully review this visa for accuracy—it’s essential.
You’ll also receive your I-20 form, required for entry into the United States.
Make sure you have both documents when you arrive.
Entering the United States: Arrival and Customs
Upon arrival, present your passport, visa (F-1 or M-1), and Form I-20 to the CBP officer for inspection.
While these documents are typically sufficient, a secondary inspection might be necessary if any issues arise.
If admitted to the country, you’ll receive Form I-94, your Arrival/Departure Record, confirming your legal entry and authorized length of stay.
Maintaining Your Visa Status
Entry Timeframe: You are allowed to enter the U.S. no more than 30 days before your program starts.
DSO Contact: Upon arrival, immediately connect with your Designated School Official (DSO).
Academic Progress: Maintaining a full course load and satisfactory academic progress is vital.
Program Adjustments: If you need to adjust your courses or program duration, consult your DSO beforehand.
Work Authorization: Unauthorized work is prohibited.
Form I-20: Ensure your Form I-20 remains current, as it’s a critical record for maintaining your F-1 status.
Additional Considerations for USA Study Visa Applicants
Visa processing times vary and are subject to change. For the most up-to-date information, please visit your local U.S. embassy or consulate website. Approval rates also fluctuate depending on individual circumstances and the specific consulate handling the application. While we strive to process applications efficiently, visa approvals are not guaranteed.
Visa Processing Time and Approval Rate
Visa processing times vary depending on the U.S. embassy or consulate, so apply well in advance of your program’s start date. You can apply up to a year (365 days) before your program begins. Upon approval, passport and visa collection is typically available the next business day. Should additional processing be required, the embassy will contact you. A designated individual with your written authorization can also collect your documents.
